

Whether you have the latest Formlabs Form 4 with Low Force Display (LFD) technology or a Form 3 series printer with Low Force Stereolithography (LFS), your freshly printed, green parts require a few post-processing steps to enhance their properties:
- Washing to remove excess resin on the surface of the parts through an alcohol or ether wash.
- Curing to solidify the material and achieve mechanical properties (optional or necessary depending on the resin).
- Sanding, buffing, and polishing for aesthetics, removing rough edges, and making retail-ready 3D-printed products.
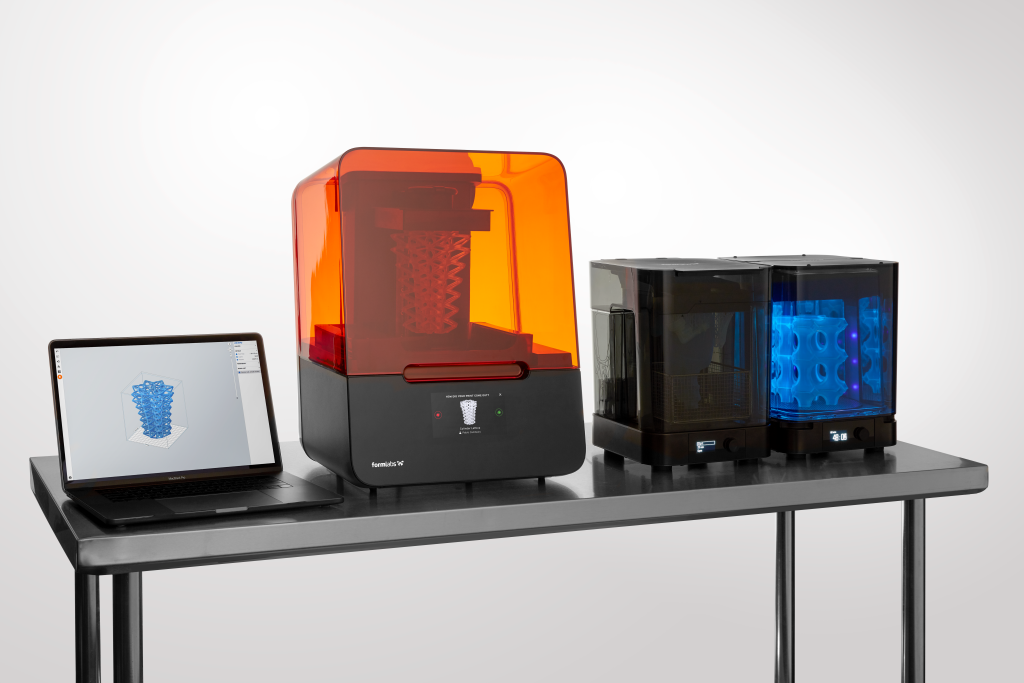
Formlabs has built a post-processing ecosystem for those washing and curing steps with the Form Wash and Form Cure. These systems automate washing and curing to enhance your workflow and ensure perfect results every time.
Formlabs also provides a Finish Kit in the box with the Form 3, Form 3L, and Form 4 generation. This kit includes everything you need to remove the printed part from the build platform, rinse it, and remove supports.
Choosing the right material, avoiding unnecessary overhangs, reducing support material, and orientating your build can also help reduce the time spent finishing your parts.
We provide more colour below.
Optimising parts for print
PreForm Print Settings Editor (advanced users)
The PreForm Print Settings Editor lets you customise print settings for Formlabs materials and certified third-party materials.
You can modify parameters and apply custom settings for exposure, layer height, resolution, scaling, heating, wiping, and interlayer motion.
For example, fine-tuning layer thickness can improve surface finish, potentially reducing the need for sanding or polishing, and adjusting early layer exposure can improve adhesion to the build platform and reduce the “elephant foot” effect.
Just a word of caution—Formlabs don’t support custom settings, so you’ll need to take a trial-and-error approach to optimise your builds.
Orientation
Orientation impacts print stability, surface finish, and printability.
Here are a few tips:
- Tilt large, flat surfaces to a 10–20° angle to increase the print success rate.
- Orient branching features to face the build platform to prevent cracking at intersections.
- Position overhanging features to be self-supporting or properly supported.
- Rotate models to minimise unsupported minima (lowest points of surfaces).
- Point hollow or concave surfaces downward to prevent suction cup effects.
- For LFS printers (e.g., Form 3, Form 3L), orient parts closer to the mixer side to minimise LPU travel.
Overhangs
Longer overhangs are susceptible to warping or detaching from the model, and unsupported overhangs can result in poor surface quality with visible layer lines that need excessive sanding and polishing.
- Keep unsupported overhangs to 5.0 mm or less — longer overhangs may not form entirely and become increasingly deformed.
- Maintain a minimum angle of 10° from level—angles less than this are more likely to break off during the peel process.
- For overhangs that can’t be avoided, use the Internal Supports feature in PreForm to ensure they are adequately supported.
Wall thickness
Walls that are too thin (less than 0.2mm) may warp or detach during printing, and walls below the minimum thickness may not print successfully or be too fragile, leaving your parts susceptible to deformation during washing.
To prevent warping or detachment, maintain unsupported walls (connected on fewer than two sides) at 0.2 mm or thicker.
For thin, vertical features, use these guidelines:
- For 7 mm tall wires, use a minimum diameter of 0.2 mm.
- For 30 mm tall wires, use a minimum diameter of 1.5 mm.
Washing
The washing stage is the first post-processing step, done directly after printing.
The point of washing it is to take your ‘green’ parts and remove uncured resin and other contaminants from the surface.

Formlabs has the Form Wash for the job. It thoroughly agitates IPA or TPM solvent across your parts with an impeller, simultaneously soaking and moving them in the solvent.
A neat feature is you can keep parts directly on the Build Platform as you transition them from the printer to Form Wash.
The Form Wash 2nd Generation supports Form 4 and Form 4B, Form 3/+, Form 3B/+, and Form 2, while the Form Wash L supports Form 3L, Form 3BL, Form 4, Form 4B, Form 3/+, Form 3B/+, and Form 2 (basically, all the L models, too).
Pre-configured wash cycles make selecting the right drying stage for your builds simple, and you can wash multiple parts of the same material simultaneously.
Only IPA and TPM are validated for use with Formlabs resins and accessories. IPA is recommended because it gets to work faster and dries quickly after washing, and it doesn’t leave a waxy surface texture like TPM on some resins.
TPM is non-flammable, and it continues cleaning parts at high resin concentrations (as the solvent dissolves resin, the concentration of resin in the solvent increases—IPA struggles with this). Also, polyurethane resins should not be washed with isopropyl alcohol.
Both have their pros and cons.
A second wash cycle is sometimes necessary to thoroughly cleanse parts, even though the first one will remove the bulk of the resin. Use clean solvent for it.
Note that thin parts can become oversaturated with IPA during a full wash cycle, which may lead to degradation or damage. Instead of a full wash cycle, use shorter, repeated washes for 2-3 minutes, allowing the part to dry completely between cycles.
Curing
The eagle-eyed among you will know that Formlabs resin printers cure liquid resin on the print bed to create solid objects.
So, what’s post-curing all about?
Printing cures the resin to its “green” state. In the green state, some polymer connections are not yet fully reacted, so the part hasn’t reached the specifications on the datasheet.
Post-curing is an additional post-processing step that fully solidifies plastic resins with heat and 405 nm light to enhance material properties.
It’s optional for Formlabs’ standard resins, Draft Resin, and Black Resin V5, but other resins require post-curing to achieve their optimal mechanical properties. Biocompatible resins always require post-curing to achieve biocompatibility.
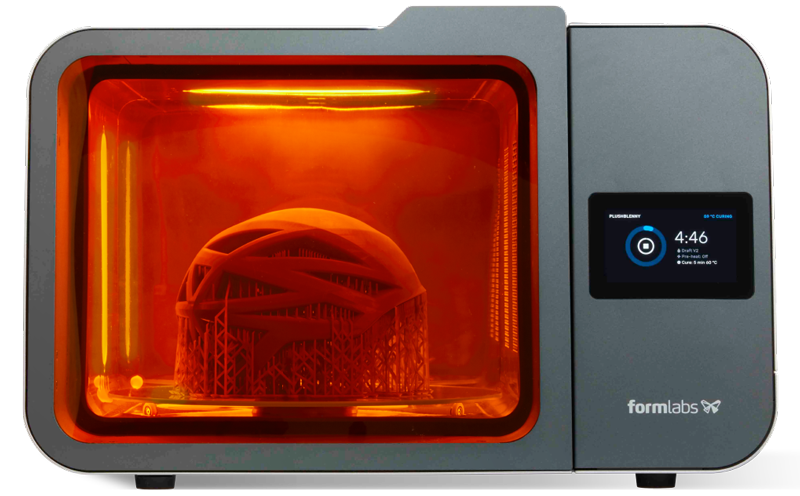
The Formlabs Form Cure and Form Cure L are the machines for the task. They have multidirectional LEDs emitting the optimal wavelength of light for curing Formlabs materials and an advanced heating system for curing temperatures up to 80 °C.
Here are a few tips:
- Ensure parts are thoroughly washed and dried before placing them in the Form Cure.
- Distribute parts evenly on the turntable to allow light and heat to reach all areas.
- Consider the size and geometry of each part when choosing a post-cure cycle.
- Let the Form Cure preheat with the parts inside to prevent cracking.
- Use the knob to navigate the display menu and set the Material, Time, and Temperature values.
- You can manually adjust Time and Temperature settings, which will change the Material value to “Custom.”
- Never operate the Form Cure with uncured resin, partially cured resin, or solvents on the turntable.
The rotating turntable provides uniform exposure during post-curing, and you can select pre-set temperature and time settings for every material.
Form Cure compatibility spans Form 4, Form 4B, Form 3/+, Form 3B/+, and Form 2, while the Form Cure L adds Form 3L and Form 3BL compatibility.
Once you’ve selected your Cure program, the Form Cure handles the rest, ensuring optimal exposure to heat and light to fully solidify your parts.
Finishing techniques
Perfecting your parts with sanding, buffing, and polishing is essential if you are building retail-ready products. You might also want to prime and paint parts to make them indistinguishable from thermoformed ones.
The good news is that parts printed with Formlabs SLA, LFS, and LFD technologies respond brilliantly to these finishing techniques:
Dry sanding
Removes raised marks and divots on the print surface left behind from support removal.
Light sanding is often all that is needed, or you can work your way down 150, 220, 400, 800, 1000, and 2000-grit sandpapers.
Wet sanding
Produces a finer finish than dry sanding and helps manage dust.
Best with mineral oil because you can then buff the part with that oil to complete it. Water is another option if you don’t want a dull shine.
Clear resin coating
You can apply a thin layer of Clear Resin to flat or near-flat surfaces to fill scratches and marks, eliminate visible layer lines, and create a smooth surface finish.
Applying Clear Resin is best when you need highly transparent parts with clear and sharp surface reflections (spray coatings can’t match the transparency).
We hope this article helps you out. Any questions on post-processing? Please message us.