




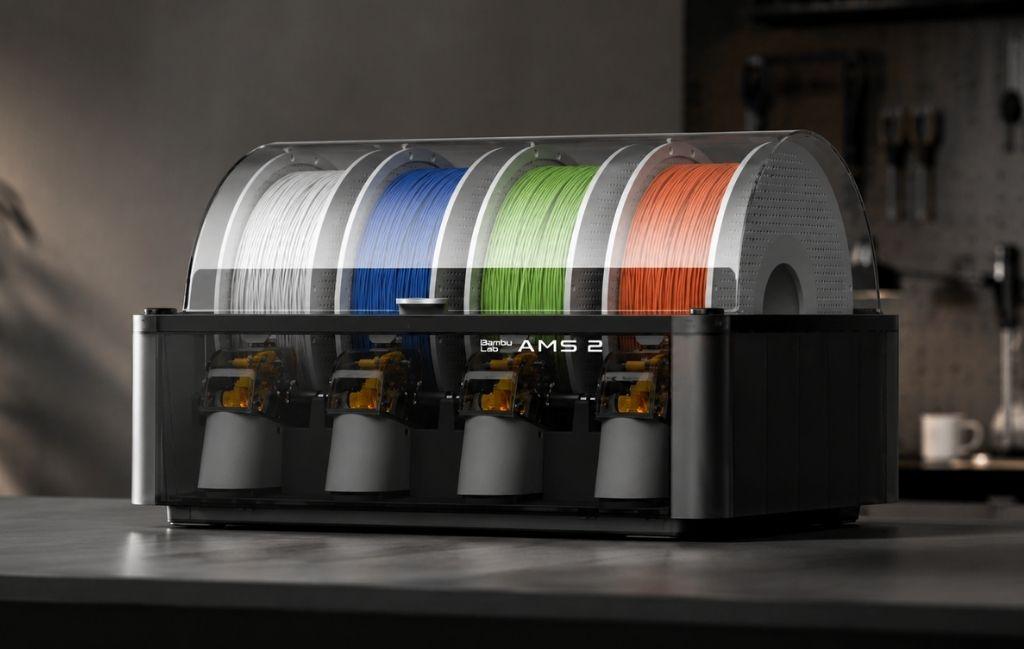
A multi material 3D printer used to mean expensive, complicated industrial equipment with a steep learning curve. Bambu Lab’s AMS (Automatic Material System) changed that, bringing genuinely practical multi-colour and multi-material printing to desktop machines at a price point most makers, schools and small businesses can justify.
That shift matters more than it might first sound. For years, multi-material capability sat firmly on the industrial side of the market, bundled with industrial pricing and industrial complexity, while desktop printing stayed single-colour, single-material and largely static. The AMS didn’t just add colour options to an existing machine. It made automatic, mid-print material switching something a hobbyist or a small studio could set up and run reliably, without specialist training or a six-figure budget.
If you’ve been printing single-colour parts and wondering whether a multi material 3D printer setup is worth the extra cost and complexity, this article explains exactly how the AMS works, what it can and can’t do well, and what to expect when you start using it.
What the AMS Actually Does
The Bambu Lab AMS 2 Pro sits alongside a Bambu Lab printer and holds up to four spools of filament (or more, with multiple units connected together). During a print, the system automatically switches between filaments as the model requires, feeding a different material or colour into the hotend at the right point in the print.
This is what makes Bambu Lab printers a genuinely practical multi material 3D printer option rather than a novelty. The switching happens automatically, mid-print, without the operator needing to pause and manually change filament.
How Filament Switching Actually Works
The physical process
When the print reaches a point where a colour or material change is needed, the AMS retracts the current filament back out of the path to the hotend, then feeds the next filament through. The hotend purges a small amount of the new material to clear any residual colour or material from the previous filament before continuing the print.
Purge waste
This purging step is the trade-off of multi-colour printing on a single nozzle system. Each colour change wastes a small amount of filament, which gets ejected as a purge block or tower alongside the actual print. For prints with frequent colour changes, this waste can add up, so it’s worth factoring into both print time and material cost when planning a multi-colour job.
Print time impact
Each filament swap takes time, typically a matter of seconds, but a complex multi-colour model with hundreds of colour changes across its layers will print considerably slower than the same model in a single colour. This is one of the most common surprises for people new to using a multi material 3D printer for the first time.
The Vortek System on the H2C: Solving Speed and Purge Waste
Everything above describes how a single-nozzle AMS setup works, and it’s still the right choice for most multi-colour printing. But Bambu Lab’s H2C takes a different approach to the same problem, and it’s worth understanding if speed or purge waste are a genuine bottleneck for your work.
Instead of pushing every filament through one nozzle and purging between changes, the H2C’s Vortek Hotend Change System swaps the entire hotend. It keeps a set of hotends on standby and swaps the whole hotend when a different material is needed, rather than flushing one nozzle repeatedly. The system manages six interchangeable, contactless induction hotends alongside a seventh fixed nozzle position, so up to seven materials or colours can run in a single print without any purge step between them. The Vortek system also works with the AMS, making the filament change process fully automatic, and an intelligent algorithm allocates filament to the appropriate hotend to minimise purge waste, extending capacity up to 24 materials in a single print.
Why it’s faster: because each hotend already holds its assigned material, there’s no cleaning cycle to wait through at each swap. Bambu’s induction heating brings a nozzle up to temperature in around 8 seconds, which is what makes frequent hotend changes practical rather than a time sink. In independent testing, a five-colour print took roughly half as long on the H2C as the equivalent job on the H2D.
Why it wastes less material: Bambu Lab reports up to 58% less purge waste compared with traditional single-nozzle AMS systems, and one review recorded a prime tower of around 40g on the H2C versus close to 280g of total waste on a comparable single-nozzle print.
The limit to know about: the purge-free benefit applies to the seven Vortek/fixed-nozzle positions. Beyond seven materials, when additional AMS units are connected for up to 24 filaments total, traditional purge logic returns for the extra materials. For most multi-colour and multi-material jobs, seven materials covers it comfortably, but it’s a distinction worth flagging for anyone assuming Vortek eliminates purging at any filament count.
In practice, this makes the H2C worth considering specifically where purge waste or print time on complex multi-colour jobs has been a real cost, rather than as a general AMS replacement. The standard AMS remains the more accessible route into multi-material printing. Shop the Bambu Lab H2C Vortek AMS 2 Pro Combo to compare against a standard AMS setup, or read our full Bambu Lab H2C Vortek deep dive for a closer look at the hotend-swap system.
What You Can Actually Print With the AMS
- Multi-colour models, logos and signage without manual filament swaps
- Parts combining a rigid structural material with a soft, flexible material
- Prints using a soluble support material alongside a standard build material, allowing complex overhangs and internal cavities to be supported and then dissolved away
- Functional parts combining different colours for clear visual identification (such as buttons, indicators or wiring diagrams on a printed enclosure)
Soluble Supports: The Underrated Use Case
While multi-colour prints get most of the attention, one of the most genuinely useful applications of a multi material 3D printer is soluble support material. Printing complex geometry, particularly parts with significant overhangs or fully enclosed internal cavities, normally means either redesigning the part to avoid the overhang or accepting rough support marks where standard support material is removed.
With the AMS, a soluble support material such as Bambu Lab PVA prints alongside the main build material, supporting overhangs exactly where needed. Once printing finishes, the part goes into a water bath and the support material dissolves away cleanly, leaving smooth internal surfaces that would be impossible to achieve and clean up with breakaway supports.
Setting Up Multi-Material Prints Successfully
Choosing compatible materials
Not every material combination works well together. Materials need compatible printing temperatures and reasonable adhesion between layers where they meet. Bambu Lab’s slicer software flags incompatible combinations, but it’s worth checking material compatibility before committing to a complex multi-material design.
Designing with purge waste in mind
Reducing the number of colour changes per layer, where the design allows it, cuts both print time and material waste. Grouping colour changes rather than alternating frequently between materials within the same layer makes a meaningful difference on longer prints.
Calibrating filament settings
Each filament loaded into the AMS should be set up with the correct temperature and flow settings for that specific material and brand. Mixing up settings between spools is a common cause of poor layer adhesion or stringing on multi-material prints, so it’s worth double-checking the assigned settings before starting a long print.
Where a Multi Material 3D Printer Makes the Most Sense
Education
Schools and colleges teaching design and engineering benefit from being able to print functional, multi-colour parts that demonstrate concepts clearly, such as assemblies with colour-coded components, without needing separate single-colour printers for each material.
Product design and prototyping
Designers testing how a product looks with different colourways, or how soft-touch and rigid materials combine in a single part, get much faster iteration with a multi material 3D printer compared to printing and assembling separate components by hand.
Small business and creative production
For makers producing signage, branded items or small-run products needing multiple colours, the AMS removes the manual labour of swapping filament and babysitting the printer through each change.
Frequently Asked Questions
Does the AMS slow down printing significantly? For single-colour prints, no, the AMS has minimal impact. For prints with frequent colour or material changes, yes, expect noticeably longer print times due to the purging and swap process at each change. The H2C’s Vortek system is Bambu’s answer to this specific trade-off for complex multi-colour jobs.
How much filament gets wasted on purging? It varies by print complexity, but frequent colour changes can mean a meaningful percentage of total filament use goes to purge waste rather than the actual part. Bambu Lab’s slicer estimates this before printing, which is worth checking against your budget for filament-heavy multi-colour jobs.
Can I use third-party filament with the AMS? Generally yes, provided the filament’s printing temperature and properties are compatible and correctly configured in the slicer. Mixed results are more likely with unusual or speciality materials, so testing a small print first is sensible before committing to a long multi-material job.
Final Thoughts
A multi material 3D printer like the Bambu Lab AMS opens up genuinely useful applications beyond just multi-colour novelty prints, particularly soluble supports for complex geometry and functional parts combining rigid and flexible materials. The trade-offs, namely purge waste and longer print times for complex jobs, are real but predictable, and easy to plan around once you understand how the system works. For jobs where those trade-offs really bite, the H2C’s Vortek system offers a purpose-built alternative worth weighing against a standard AMS setup.
If you’re deciding whether the AMS is worth adding to your setup, think about whether your typical prints would benefit more from soluble supports for complex geometry, or from multi-colour output for finished parts. Book a demo to see the AMS running on a real print before you decide.