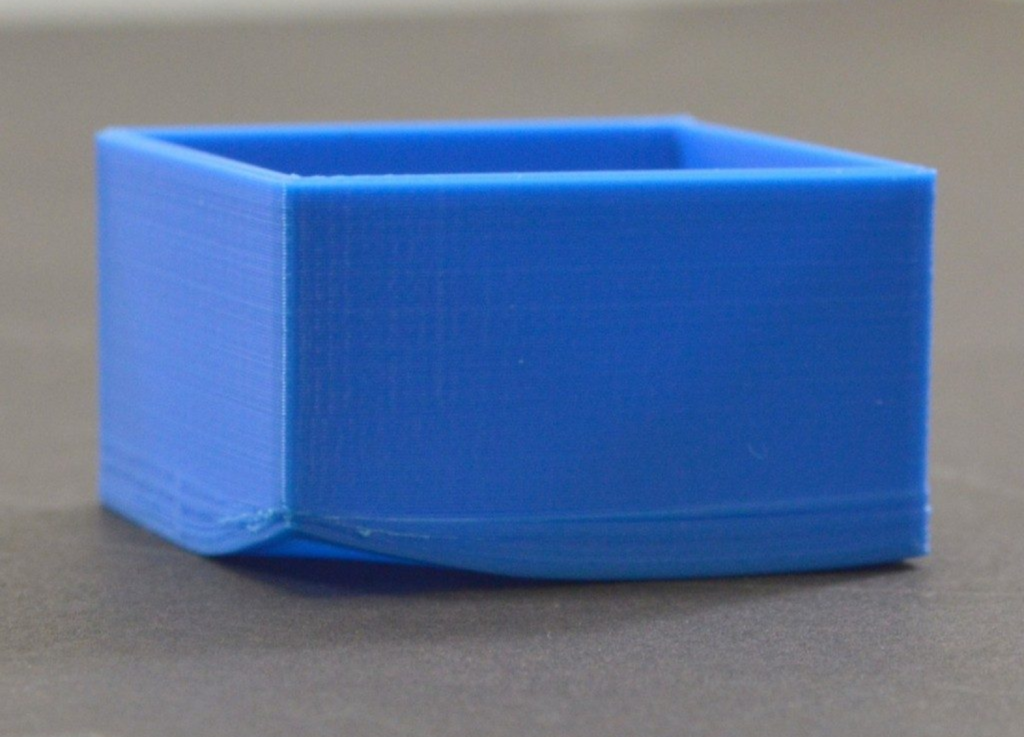
When thermoplastics solidify during printing, shrinkage happens. Uneven cooling rates create uneven contraction. As parts of the plastic shrink at different rates, internal tensions build. The layers pull and stretch against each other, and warping and detachment can distort the materials.
Warping threatens even experienced makers, ranking among the most common 3D printing failures. Fortunately, it also lends itself to straightforward solutions. Here’s what causes that characteristic warping and detachment from the build platform:
- Temperature Differences: If parts of the print are hotter than others, shrinkage happens unevenly.
- Drafts and External Temperatures: Open windows, doors, and cold ambient temperatures speed up cooling when printers don’t have an enclosed chamber.
- Incorrect Print Settings: The temperature, cooling fans, build plate adhesion, and print speed influence cooling.
- Poor Bed Levelling: Improper first layer adhesion leaves room for detachment upon cooling.
- Insufficient Bed Adhesion: Lack of stickiness allows the print to lift as it cools and shrinks, which is why people use glue sticks.
How to Prevent 3D Print Warping in FFF
Use a Heated Print Bed
A heated bed keeps prints warm throughout the print process, maintaining an even temperature throughout the print, preventing uneven cooling and shrinkage in some materials. Refer to the manufacturer’s recommendations for temperatures.
Print in an Enclosure
Enclosing the 3D printer traps heat and blocks external drafts. The stable internal temperature stops parts of the print from cooling faster. Simple DIY enclosures can be made from cardboard or acrylic sheets.
Ensure Proper Bed Levelling
An uneven print bed means poor first-layer adhesion in some spots, allowing warping to start as the plastic detaches easily. Levelling the bed manually or with your printer’s automatic feature ensures proper adhesion across the first layer.
Use Adhesives/Tapes for Bed Adhesion
Adhesives like glue sticks, hairspray, and dedicated printer bed adhesives improve adhesion. Blue painter’s tape also works very well. They help the print cling to the bed evenly and resist warping from shrinkage forces.
Optimise Material Settings
Some materials like ABS and PETG are more prone to warping. Tuning your specific material’s optimal temperature and cooling settings plays a significant role. Refer to manufacturer guidelines.
Insulate Against Ambient Conditions
If you don’t have an enclosed print chamber, simple cardboard shields around the printer can block drafts. Sealing doors and windows helps maintain a stable ambient temperature. Avoid placing printers near HVAC vents, as well.
Use Warping Mitigation Features
Enabling options like a skirt, brim, or raft in your slicer gives additional surface contact to support prints and prevent warping. These can anchor prints firmly to the print bed and combat warping forces. Orientation and geometry tweaks also help.
What about warping with SLS technology?
Warping is a tricky issue with laser sintering. As the melted material cools and hardens, it shrinks. If some areas shrink more than others, parts can curl or separate from the powder bed. Two main culprits are significant temperature differences across skinny or complex shapes. Thin walls or sections and abrupt changes in thickness are prime warp candidates.
Uneven cooling stresses weak points. Orienting long builds vertically helps, as does printing near the centre, far from chamber edges and their cooling fans.
Letting the temp gradually decrease post-build gives things time to normalise before moving sensitive parts. It’s a balancing act, but with a sharp eye on geometry, placement, and cooling, SLS warping can become a thing of the past.
What about warping with SLA technology?
We can outsmart warping with SLA by being smart about print orientation. Printing vertically and tweaking angles to avoid drastic layer differences helps. For big models, divide and conquer – splitting into smaller sections minimises suction strain. And reality check those walls – if they’re unsupported, make them thick so they don’t detach and go rogue.
Distortion disasters can also strike SLA prints when the flexible film at the bottom of the resin vat starts wrinkling. This film must stay smooth and tight as layers cure and peel away. But over time through normal wear and tear creases can gradually form, causing uneven print layers.
Incorrect model orientation, such as printing vertically without supports, can lead to excessive forces between the print, plate, and resin vat, causing warping when the plate lifts. Inadequate bottom layer exposure time and the number of bottom layers mean interlayer adhesion is weak, and lower layers cannot support the weight of upper layers, resulting in warping. Try increasing exposure time and the number of bottom layers.
Need more help? Contact Additive-X for help with warping and print failures.


