

Your Formlabs Fuse 1+30W SLS printer comes pre-calibrated from the factory and is ready to deliver industrial-grade results immediately upon setup.
Formlabs performs rigorous calibration before shipping, ensuring excellent baseline performance for most applications.
Advanced users requiring extreme dimensional accuracy can benefit from X/Y scaling adjustments. You can fine-tune your printer to achieve dimensional accuracy within ±150 μm tolerances, crucial for precision engineering parts.
Editor’s note: All instructions in this article are via Formlabs’ guide here. We invite you to visit the official site for additional insight.
When to perform X/Y scaling calibration
Most users should rely on factory calibrations, which Formlabs technicians perform rigorously before shipping. However, specific situations warrant manual calibration:
- When instructed by Formlabs Support or your authorised reseller
- After changing print settings or powder types
- For applications requiring tighter dimensional tolerances
- When producing parts with critical fit requirements
Remember, unnecessary calibration may introduce errors into previously well-tuned systems. When uncertain, contact your authorised reseller or Formlabs Support for guidance before proceeding with adjustments.
Essential preparation steps
Before starting the calibration process, update your printer with the latest firmware. Tap the wrench icon on your touchscreen to navigate to the settings menu, then select System > Firmware Update.
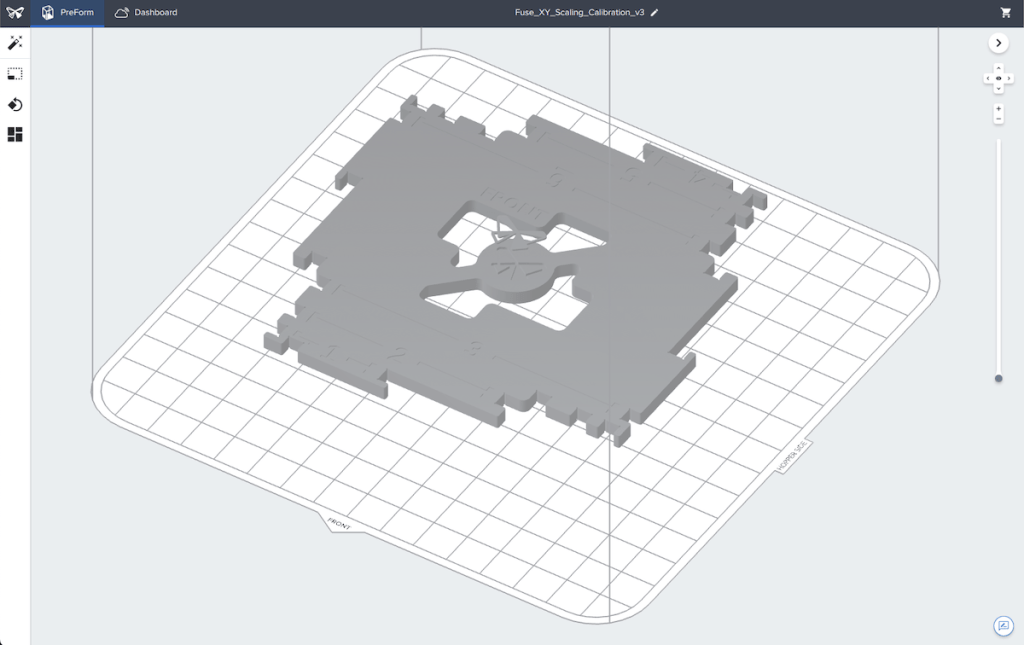
Insert a clean build chamber into your Fuse 1+30W 3D printer. Download the latest PreForm software version, including the calibration test file for X/Y scaling adjustments.
The test file creates a double-sided printed part with precise measurement points, allowing you to determine the current dimensional accuracy.
When loaded into PreForm, avoid manipulating the test model in any way. Do not move, rescale, or reorient it or you could compromise calibration results.
Select your specific printer from the dropdown menu and choose the powder material you plan to use for production. PreForm automatically applies the correct print settings for your selected material.
Proper post-processing for calibration parts
SLS-printed parts remain susceptible to warping if cooled too quickly. Proper cooling proves especially critical for calibration parts since any deformation invalidates measurements. Allow at least 5 hours and 30 minutes of cooling time before attempting post-processing.
Verify that the print enclosure temperature has dropped below 35°C (95°F) before handling calibration parts. Then, remove the build chamber and transfer it to your Fuse Sift station for unpacking.
Carefully extract the calibration print from the powder cake, ensuring you do not damage any measurement surfaces.
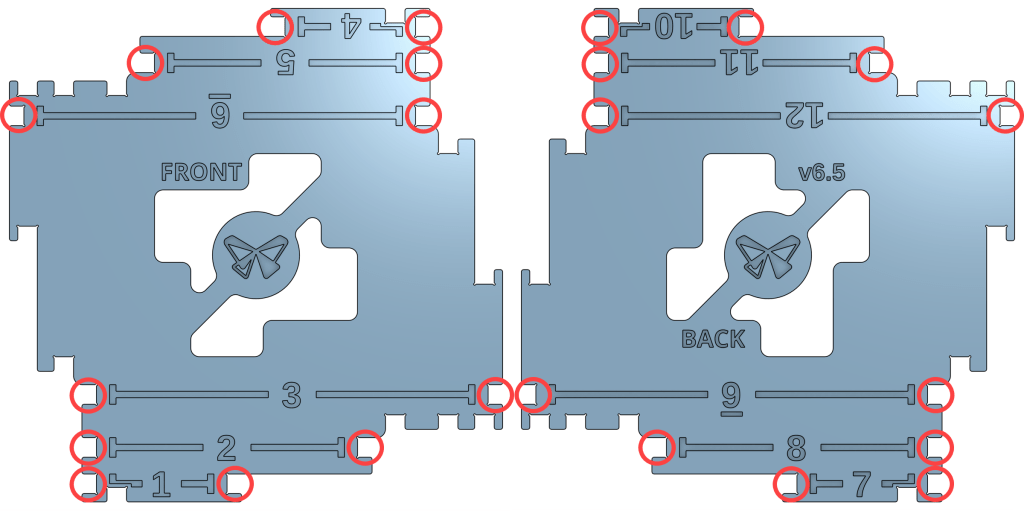
Thoroughly clean all powder from the calibration print using your Fuse Sift. Consider the 24 measurement points, as residual powder creates measurement errors.
Complete cleaning requires media blasting to thoroughly remove any remaining powder and Surface Armor from the part.
Taking precise measurements
Accuracy during measurement directly affects calibration quality. For best results, use digital callipers, fully closing and zeroing them before beginning. Check the zero calibration periodically throughout the measurement process to prevent drift.
When measuring between each pair of slots on the calibration print:
- Position the callipers at the flat part of the lower jaw
- Hold them perpendicular to the printed part
- Align to the same edge face for all measurement slots
- Record each measurement precisely
The calibration print contains 12 measurement points corresponding to specific input fields on your printer’s touchscreen. Measure all points carefully and record each value for entry into the calibration tool.
Applying calibration values to your printer
You can access the X/Y Scaling calibration tool through your printer’s touchscreen by tapping the wrench icon and selecting Calibration > X/Y Scaling. The tool guides you through entering measurements from your calibration print.
Enter all 12 measurements into the corresponding fields. The system verifies each value falls within expected ranges, flagging any suspicious measurements that might indicate errors.
Once all values are correct, tap Calculate to generate your Fuse 1 3D printer’s custom X/Y scaling values.
These calibration settings apply automatically to all future prints using your tested material. Remember that each printer and powder combination requires its calibration process. Values from one printer cannot be transferred to another, even if they appear identical.
Troubleshooting calibration issues
If calibration results prove unsatisfactory, first try re-measuring your calibration print. Small measurement errors significantly impact calibration quality.
Ensure your callipers remain properly zeroed between measurements and verify you measure at precisely the same points each time.
For persistent problems, reset to factory defaults before attempting fresh calibration. That will help prevent compounding errors when calibrating an already miscalibrated system. Select the reset option in the X/Y Scaling menu to access factory defaults.
When calibration issues continue despite multiple attempts, contact Formlabs Support with details about your measurements and results. Support technicians may request photos of your calibration print or specific measurement techniques to diagnose problems accurately.
Maintaining calibration over time
Your Fuse 1+30W maintains calibration stability well, but periodic verification ensures continued accuracy. Print a calibration test model every few months or whenever you suspect dimensional issues with production parts. Compare measurements against previous values to detect potential drift.
Environmental factors like temperature fluctuations and vibration can gradually affect calibration. To minimise these effects, position your printer away from heat sources, air conditioning vents, and equipment generating strong vibrations.